

Are you looking to make your new IceCap Gyre Interface Module work with your APEX by Neptune Systems?
In this video, Carlos of CoralVue demonstrates how to program your Neptune System’s APEX controller to take advantage of the IceCap module and make your Maxspect Gyre do things you never thought possible.
By the end of this video, we will have set up 4 different speed and pulsing profiles with a programmed schedule that will:
- 8 am to 9 am: Ramp Up from 30% to 80% speed
- 9 am to 6 pm: Pulse for 20/10 seconds at 80/30 speed
- 6 pm to 7 pm: Ramp Down from 80% to 30% speed
- 7 pm to 8 am (next day): Constant flow at 30% speed
- Feed Mode: Shuts pump OFF
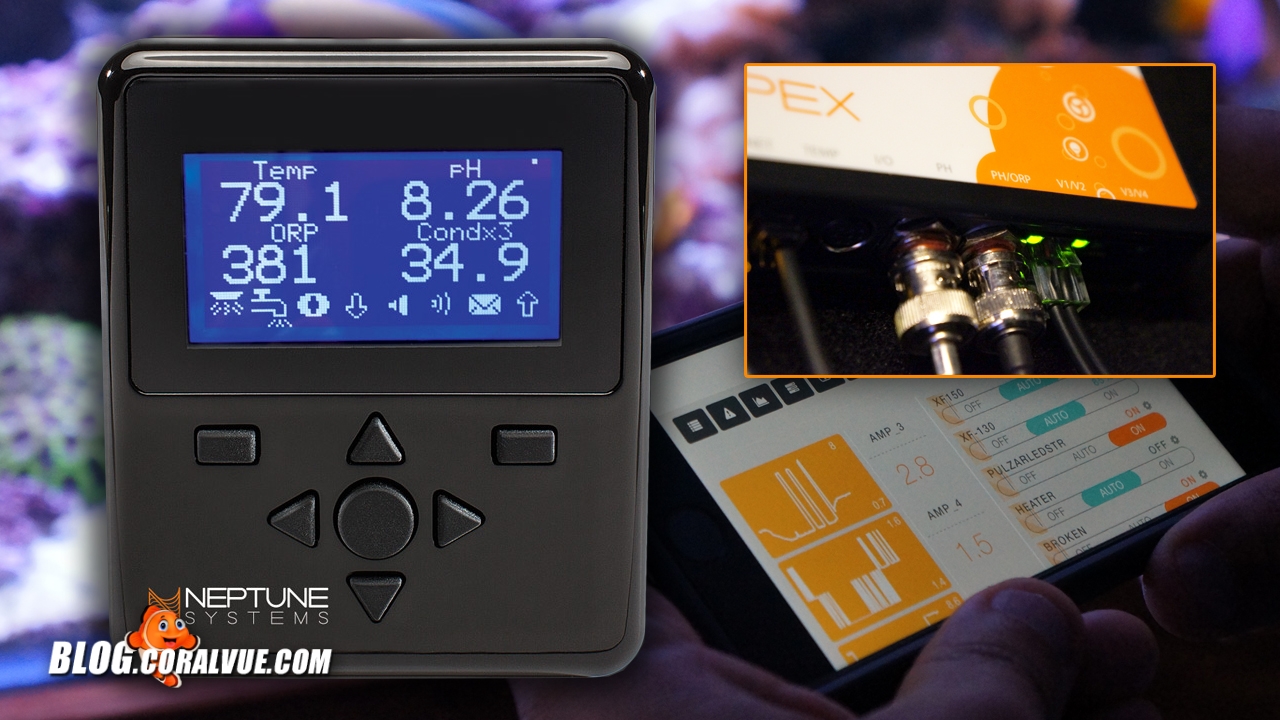
APEX Controller by Neptune Systems is required to be fully installed to follow these directions.
Now, this video will only cover the configuration and programming of your IceCap module with an APEX controller from Neptune Systems.
- It assumes that you already have a fully configured and working APEX Controller as well as a free Variable Speed port.
- You should be familiar with the creation of virtual and regular outlets.
If you have not configured your APEX controller, a really good place to start is Neptune Systems website. They have an amazing website full of support articles, videos as well a support forum with a thriving community of experienced staff and fellow APEX users.
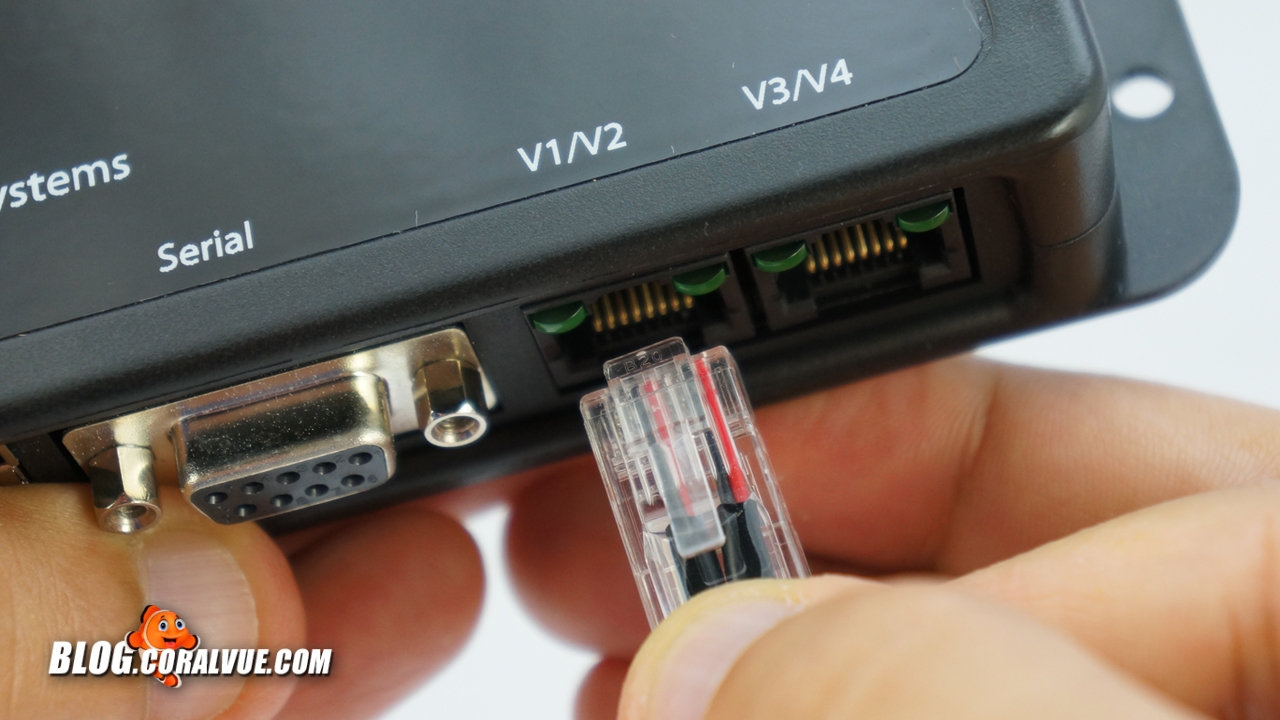
Make note of the Variable Speed port you connected your pump to.
With that in mind, we must first turn off both outlets and then turn them back on one at a time. Just make note of which outlet turns your pump on and off as that will be the outlet that we will be working with.
Step Two: Create Profiles
We will need to create 4 different profiles to accomplish the different flows on our schedule.
Ramp_Up Profile
- Create a new profile and call it "Ramp Up"
- Select "Ramp" as Control Type
- Set "Ramp Time" to 60, "Starting Intensity" to 30 and "End Intensity" to 80
- Click Update to save
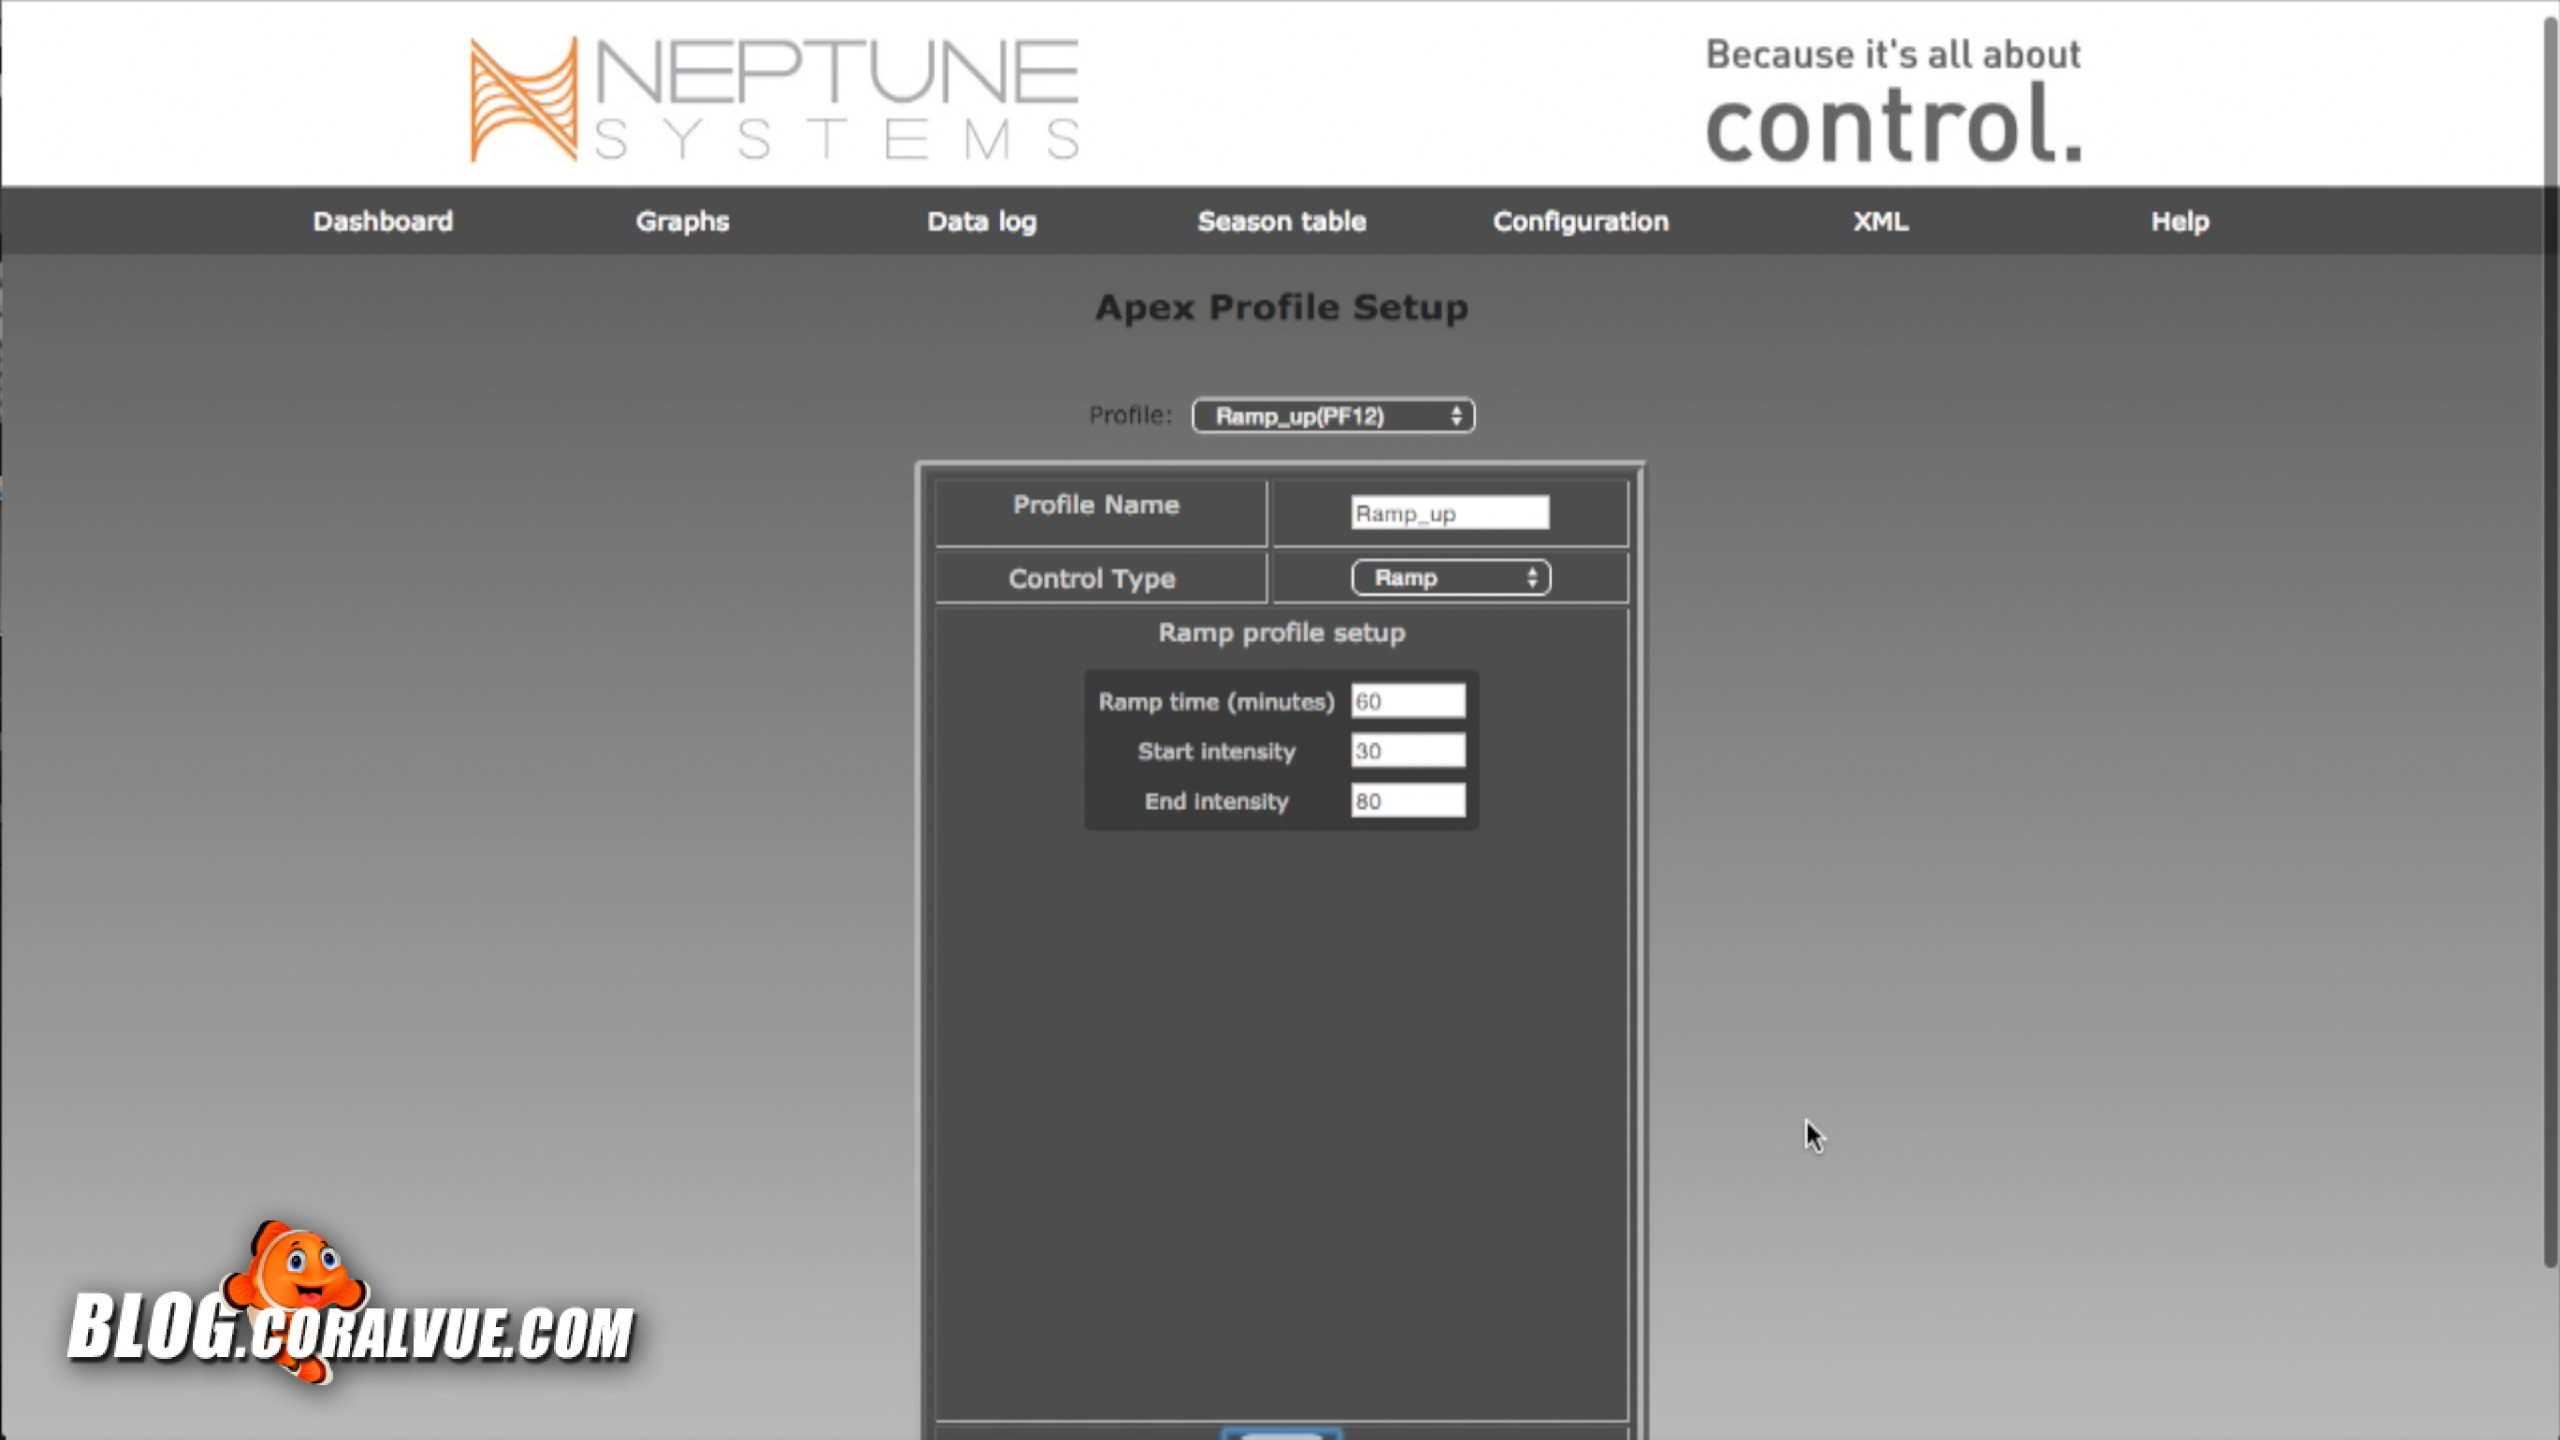
Ramp Up Profile
Pulse Profile
- Create a new profile and call it "Pulse"
- Select "Pump" as Control Type
- Leave "Synchronize" and "Divide by 10" unchecked
- Set "Initial Off Time" to 0
- Set "On Time" to 20 seconds
- Set "Off Time" to 10 seconds
- Set "Minimum Intensity" to 30
- Set "Maximum Intensity" to 80
- Click Update to save
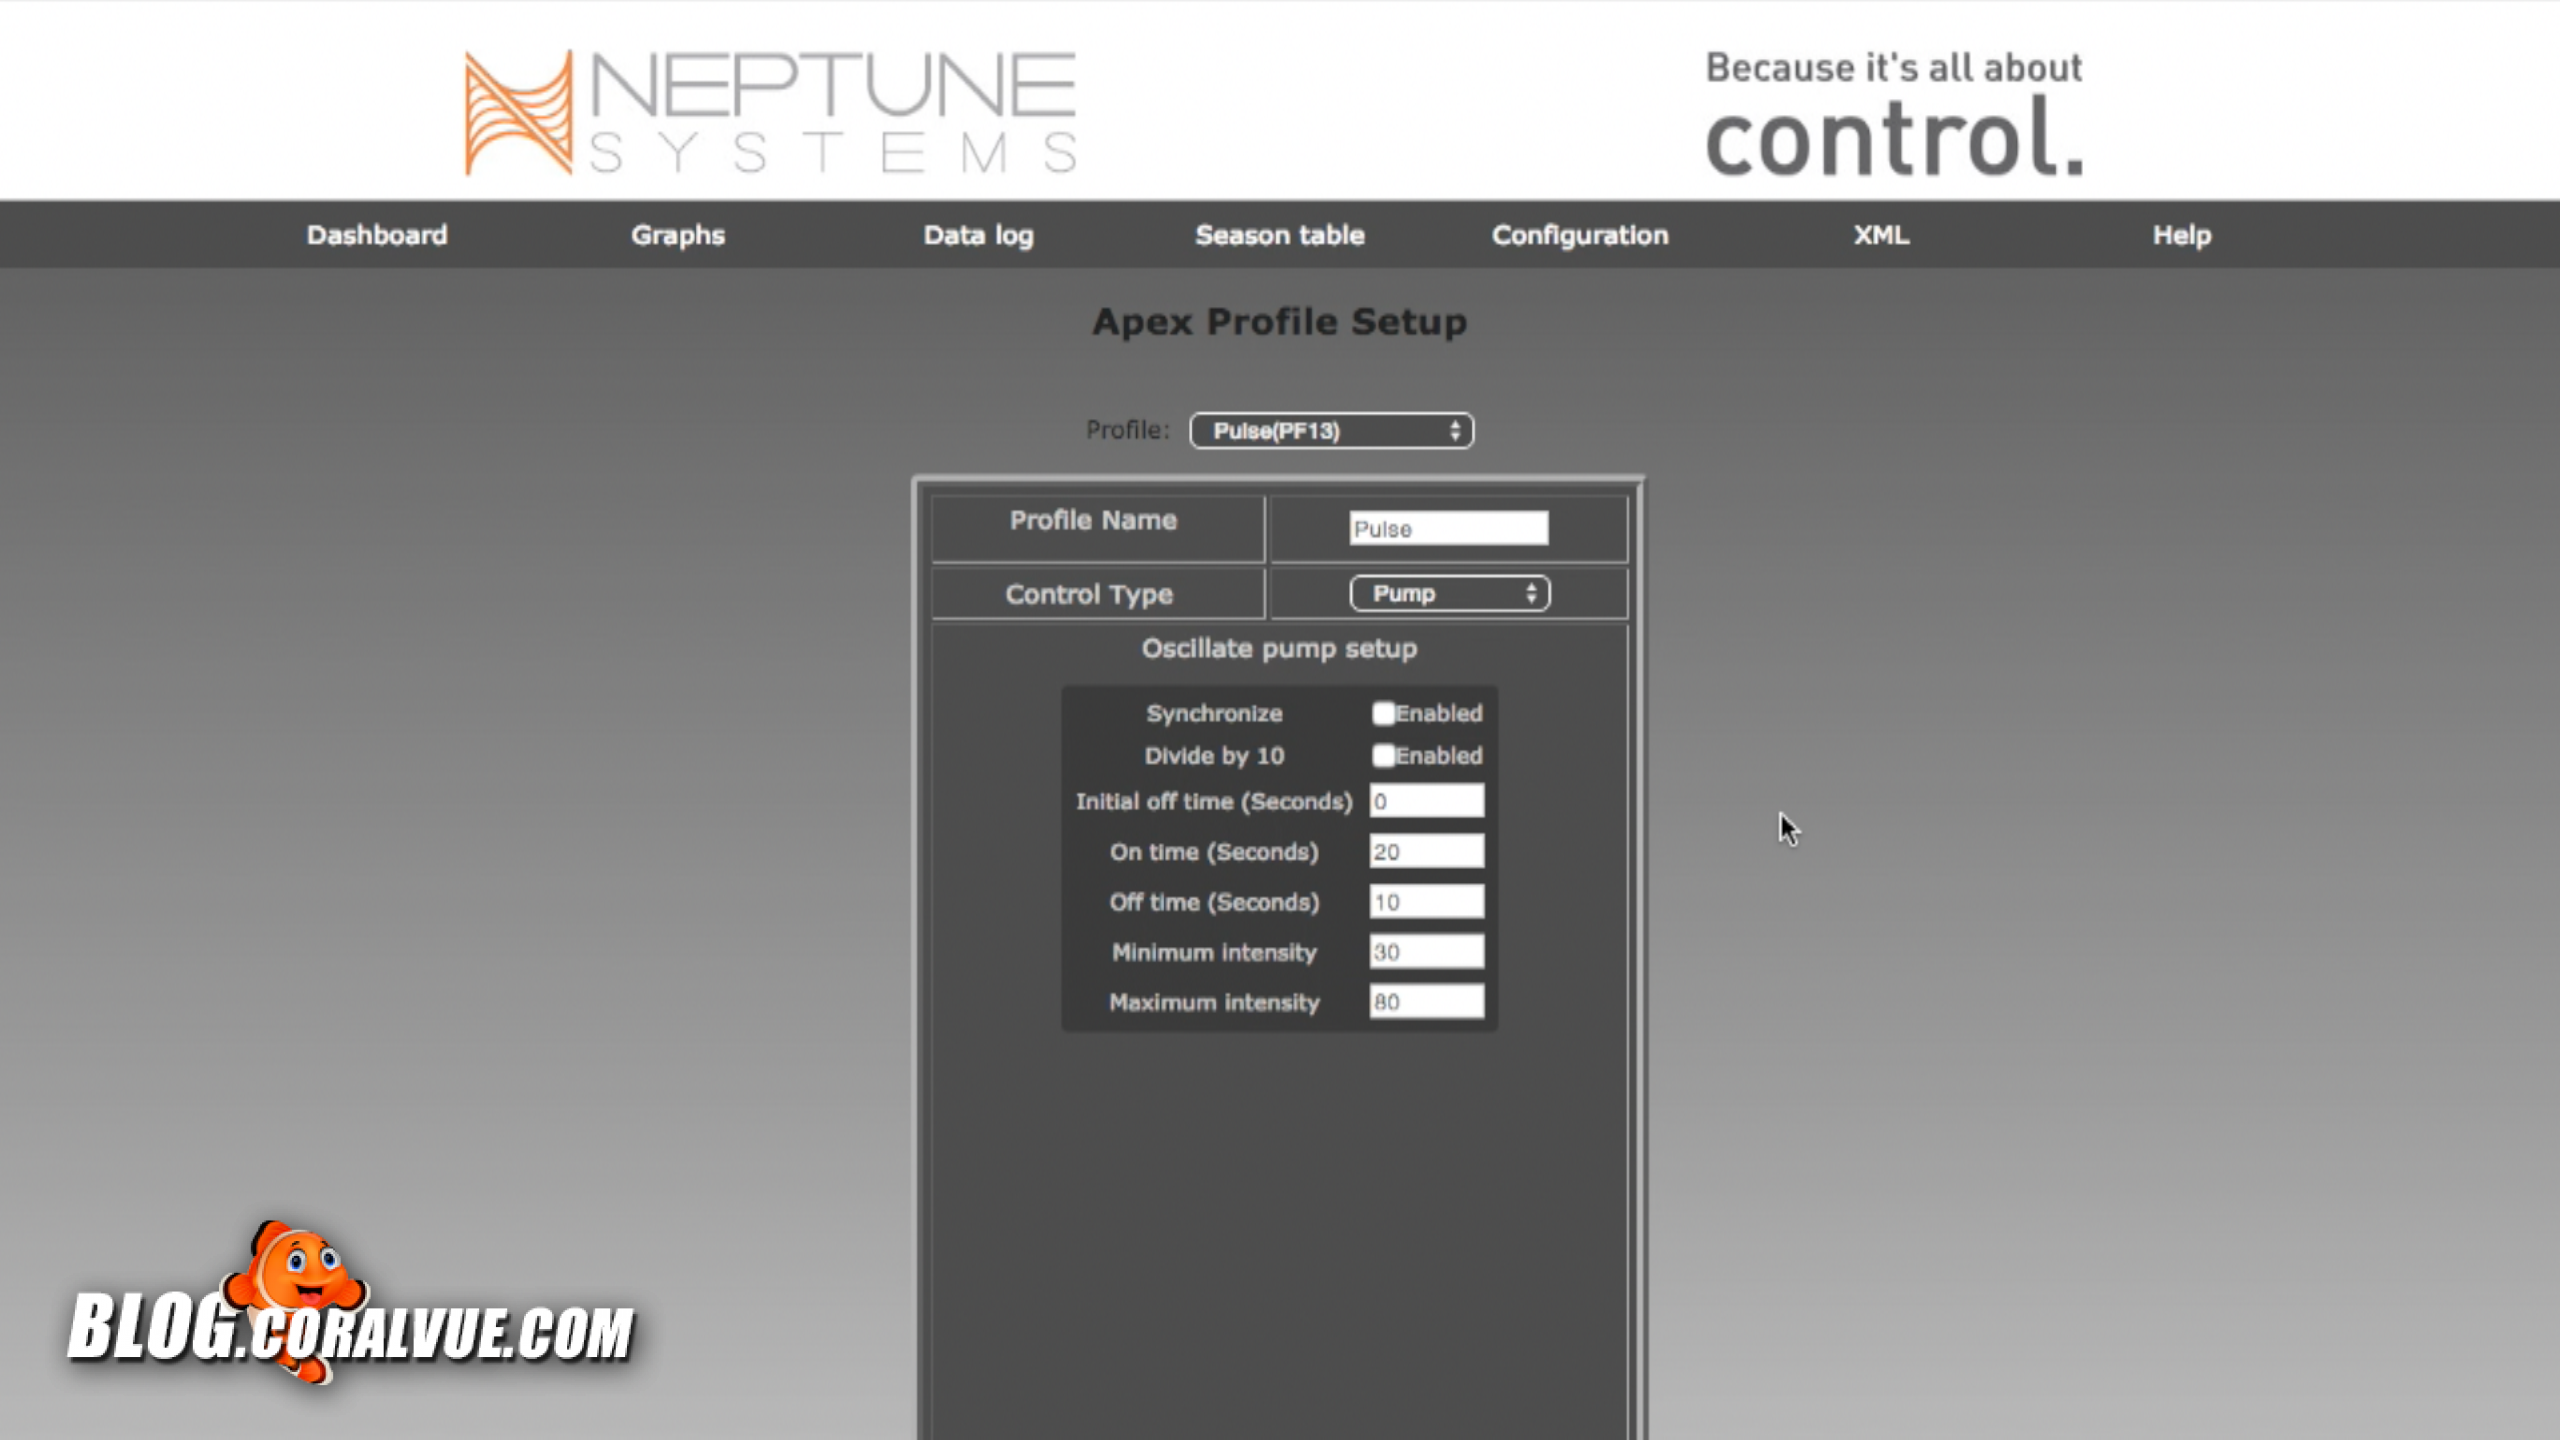
Pulse Profile
Ramp_Down Profile
- Create a new profile and call it "Ramp Down"
- Select "Ramp" as Control Type
- Set "Ramp Time" to 60, "Starting Intensity" to 80 and "End Intensity" to 30
- Click Update to save
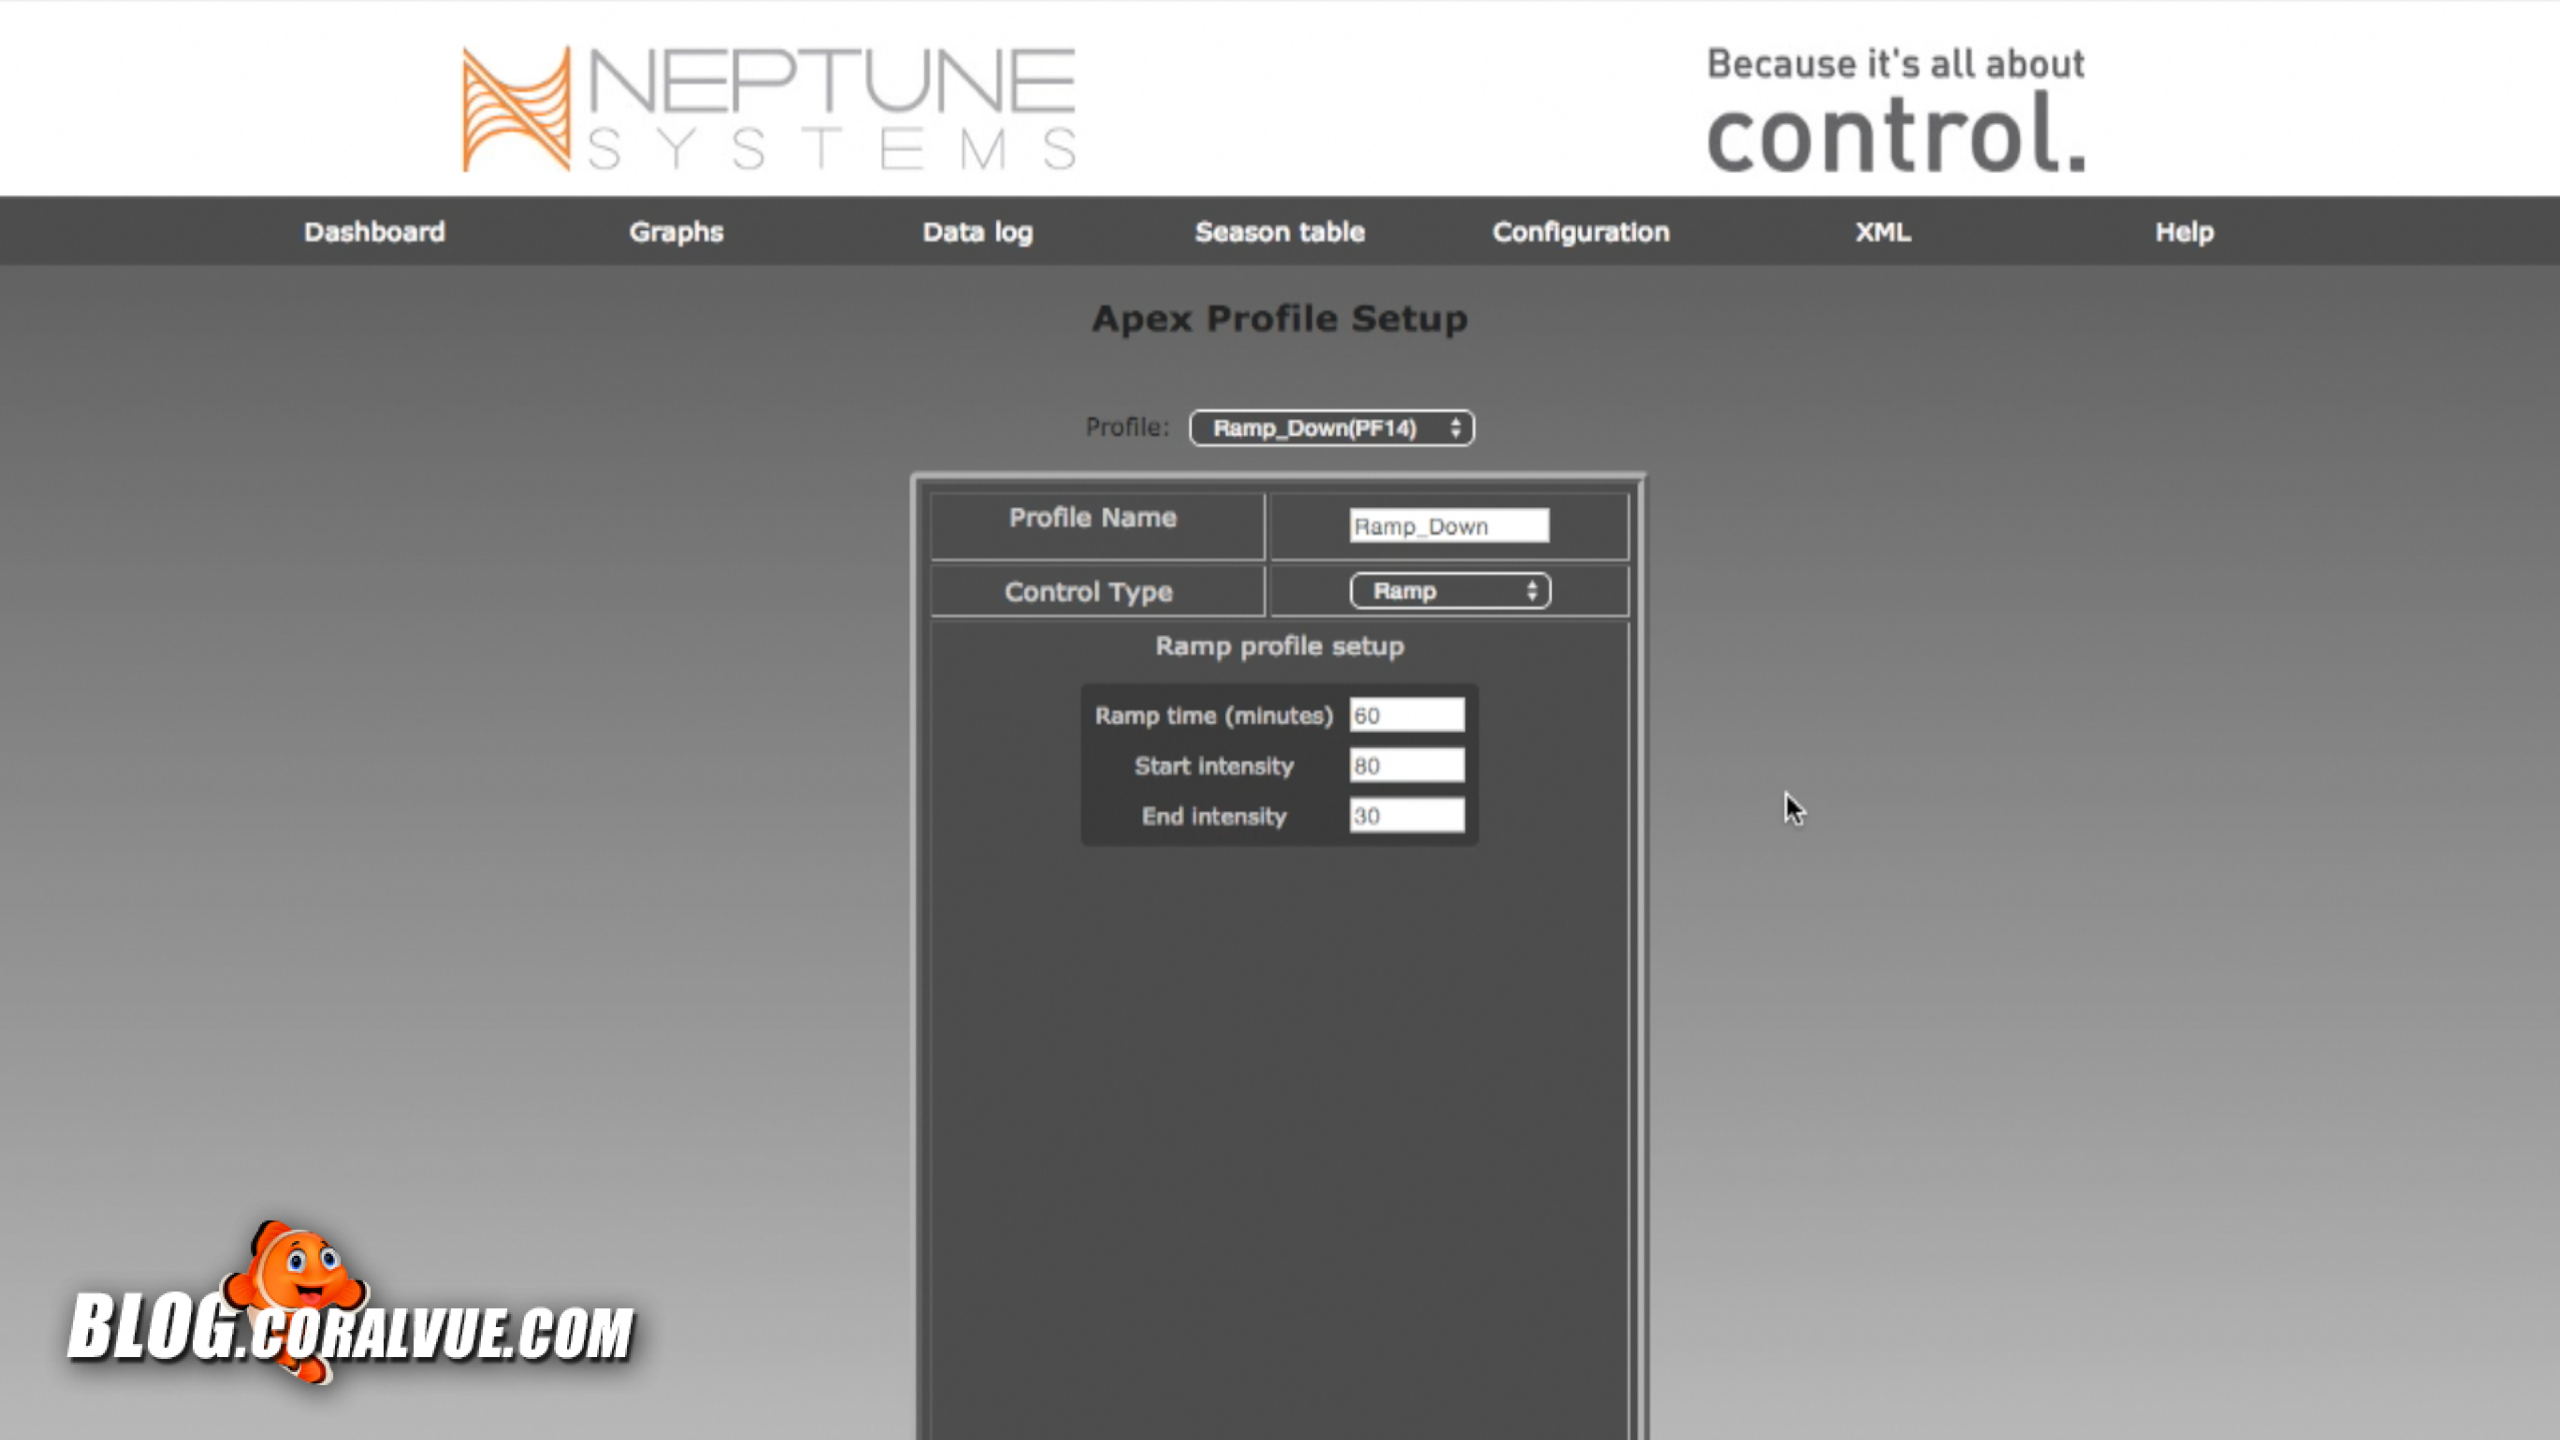
Ramp Down Profile
Night Profile
- Create a new profile and call it "Night"
- Select "Pump" as Control Type
- Leave "Synchronize" and "Divide by 10" unchecked
- Set "Initial Off Time" to 0
- Set "On Time" to 60 seconds
- Set "Off Time" to 60 seconds
- Set "Minimum Intensity" to 30
- Set "Maximum Intensity" to 30
- Click Update to save
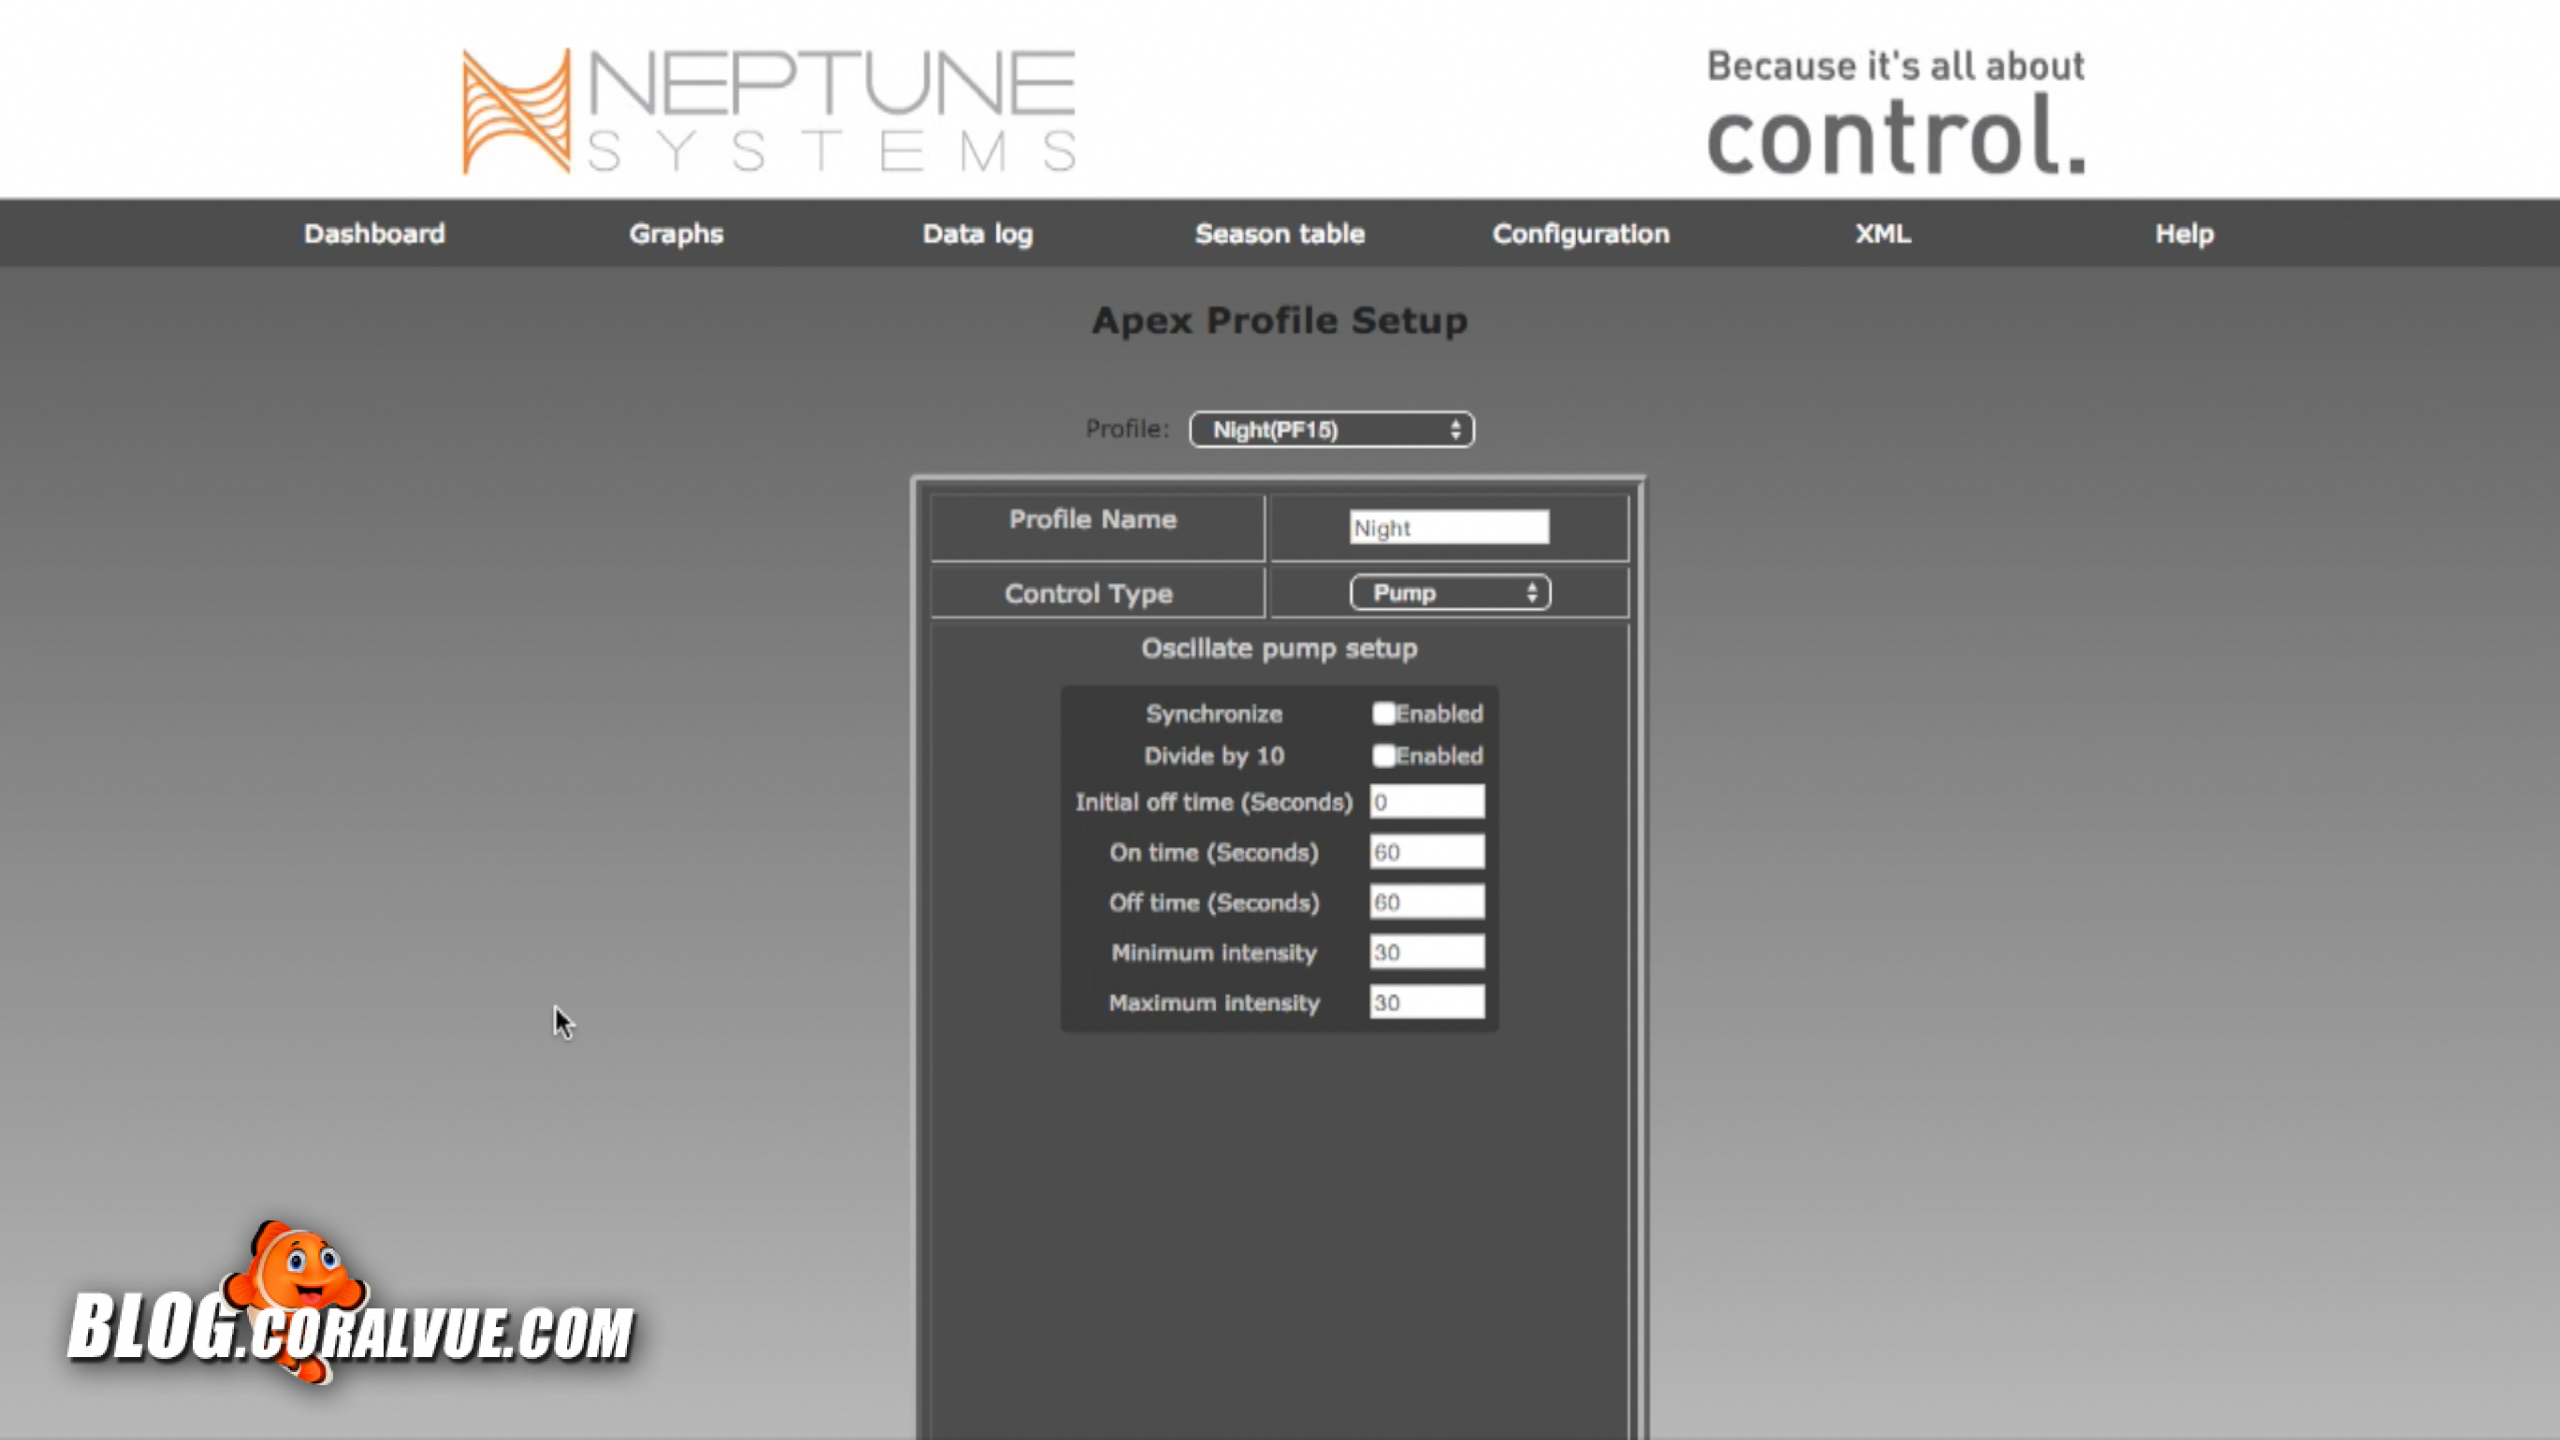
Night Profile
Step Three: Configure Outlet
The next step is to configure the outlet. Hover over "Configuration" and then click on "Outlet Setup". Then click on "Outlets" and find the variable speed outlet the pump is connected to.
To configure it, do the following:
- Rename the Outlet "XF130_Gyre"
- Click on "Control Type" and select "Advanced"
- Set the Icon to "Fan"
- Leave "Enable Log" selected
The "Advanced Setup" windows is where the schedule program will be created. For an explanation of what the programming means, please watch the video above.
Here is the code so you may easily copy and paste it to your Outlet:
If Time 08:00 to 09:00 Then Ramp_Up
If Time 09:00 to 18:00 Then Pulse
If Time 18:00 to 19:00 Then Ramp_Down
If Time 19:00 to 08:00 Then Night
If FeedA 000 Then OFF
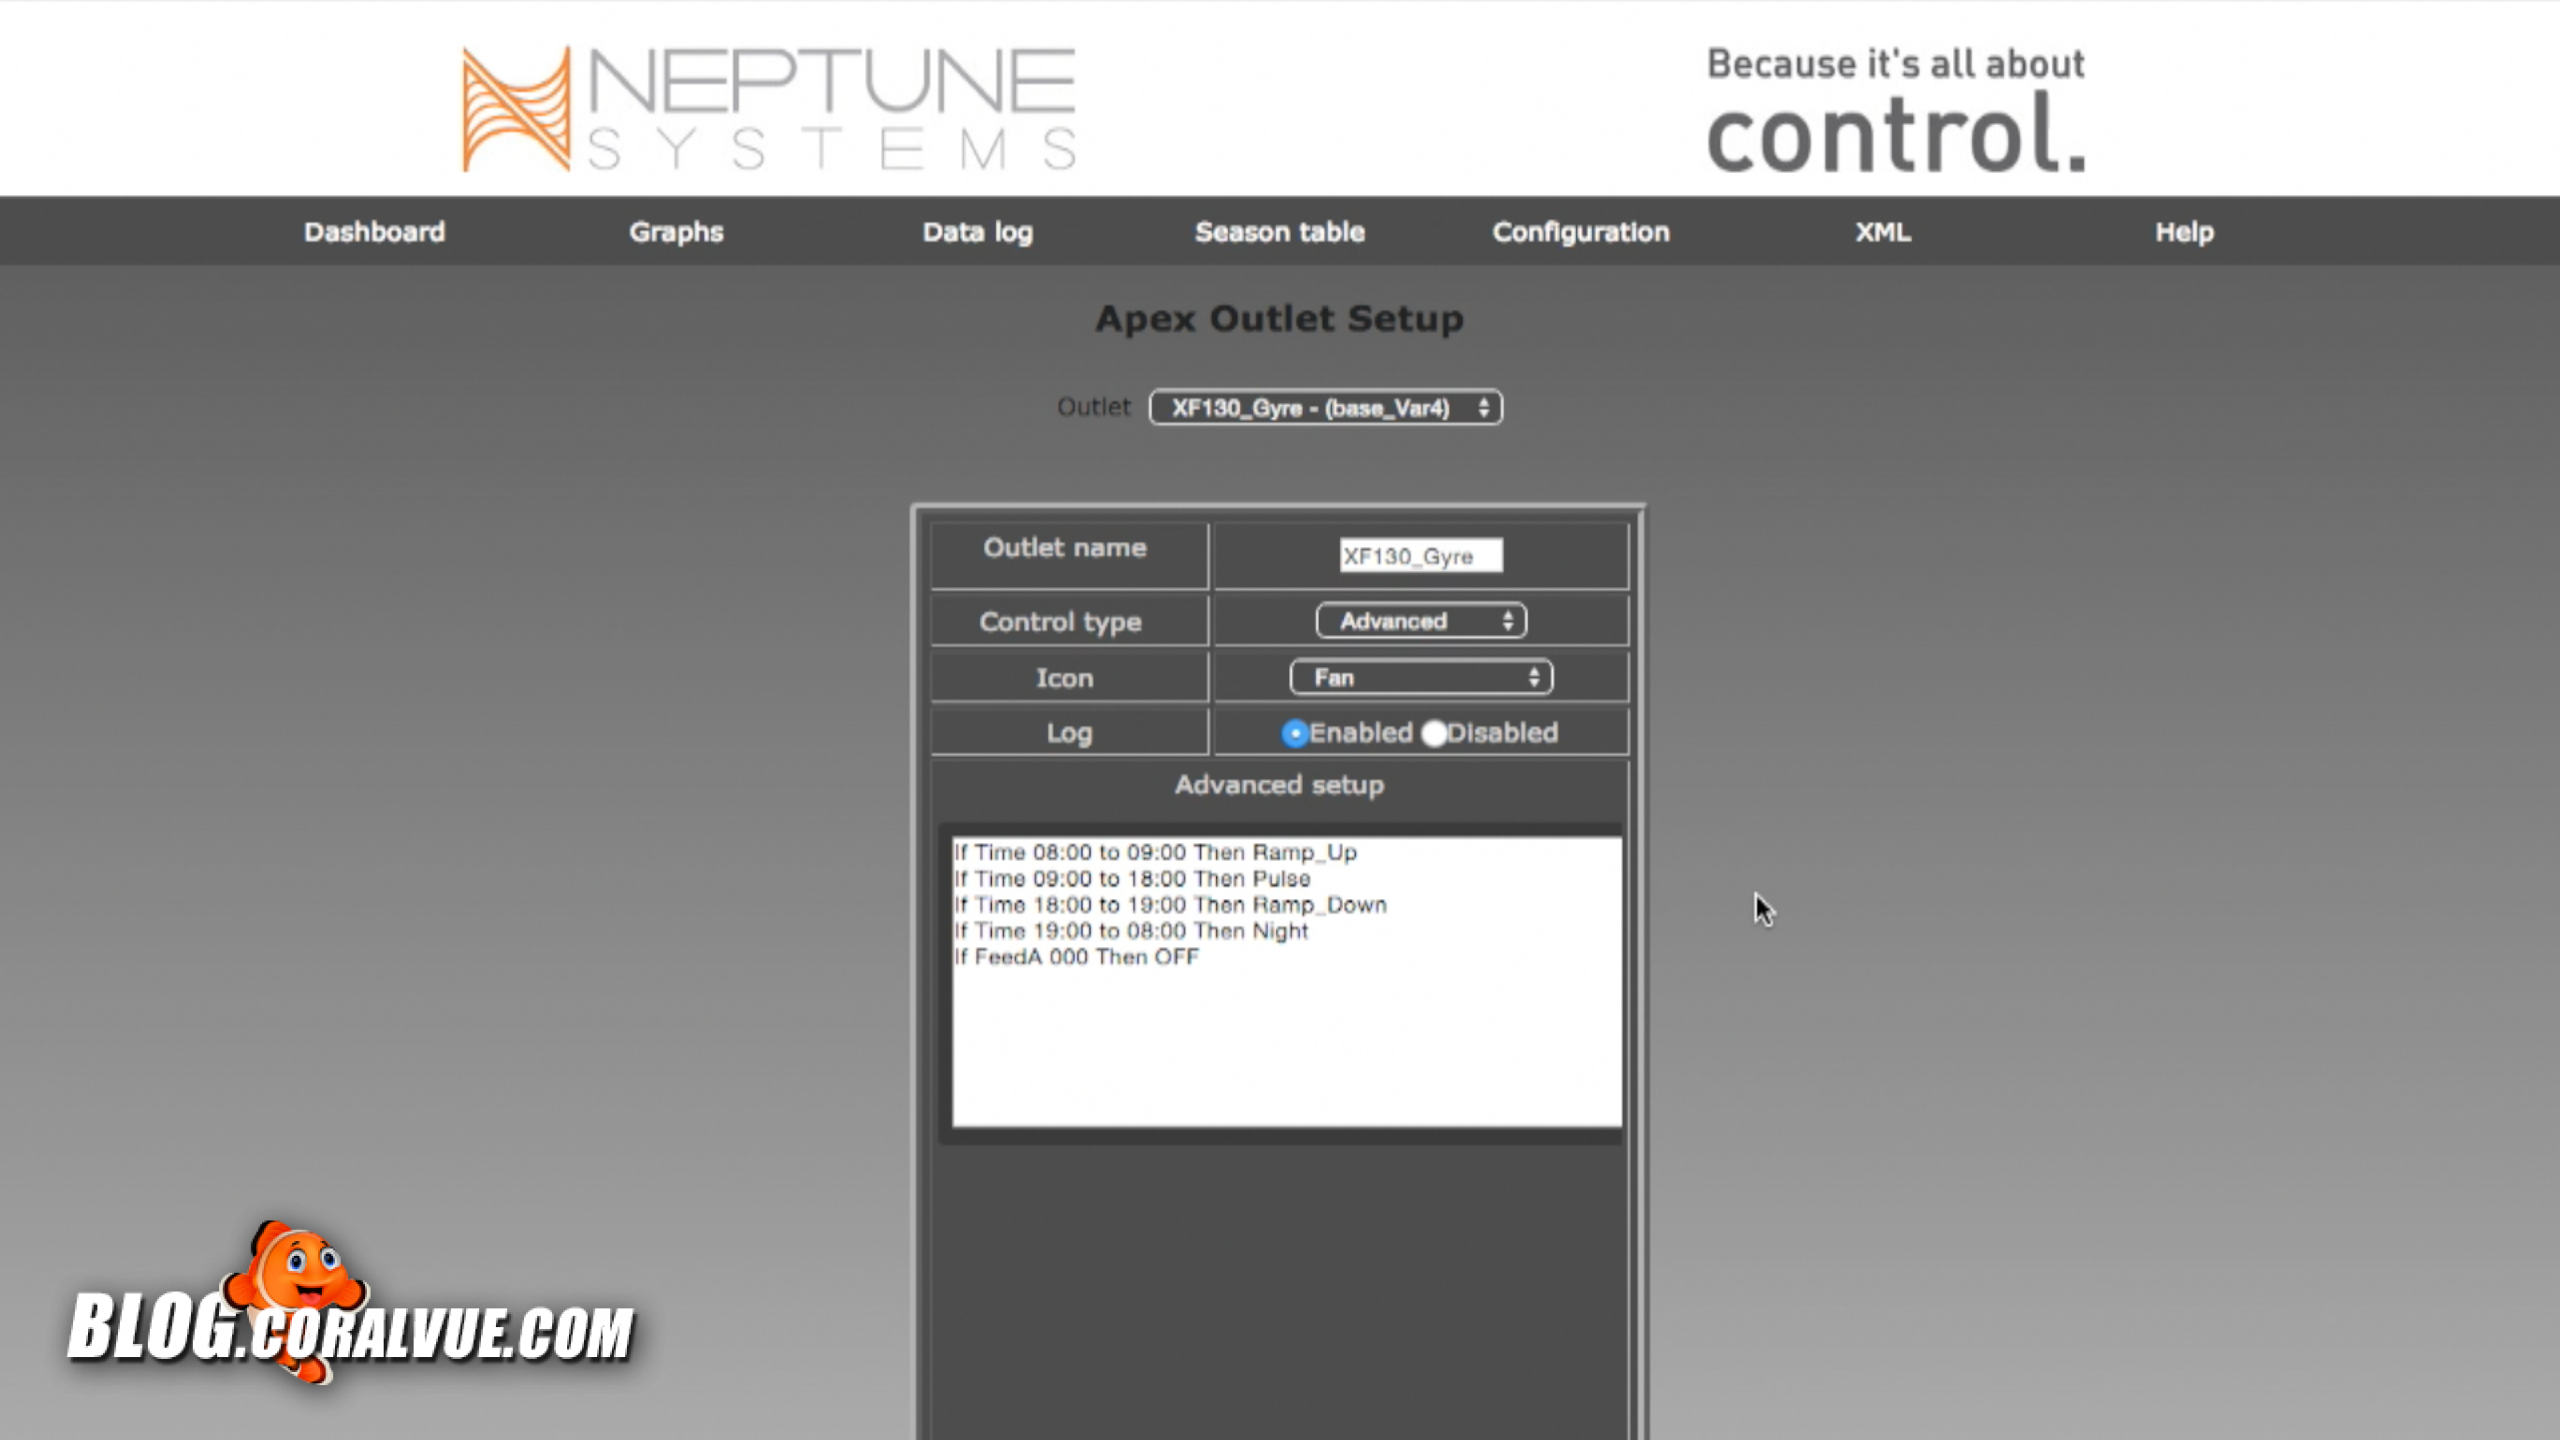
Configured Variable Speed Outlet
Don't forget to scroll down and click "Update" to save your changes!
Step Four: Set Outlet to AUTO
Go back to the Dashboard and make sure that the outlet "XF130_Gyre" is set to AUTO.
Please use the information you learned as a base or starting point and feel free to experiment more. Go ahead and create more profiles and have the pump change flow patters multiple times during the day.
Your pump is now able to do things that it could not do before so have fun with it… the sky is the limit.
For those of you that want to push the pump to the limit with more advanced flows in both forward and reverse directions, please watch our upcoming video “IceCap Gyre Interface Module: Alternating Gyre Mode”. We will unlock the true potential of this amazing pump by having it change directions as well as different pulsing speeds. You will need a special cable which was not included in the box but, if you haven’t done so already, can be purchased now at coralvue.com. So purchase the cable today and have to ready for our next video where we cover “Icecap Gyre Interface Module: Alternating Gyre Mode”.
If you would like more information on the IceCap Gyre Interface Module check out the link below. If you have any technical questions that you wish to ask, please head over to www.coralvue.com/support and submit a support ticket.